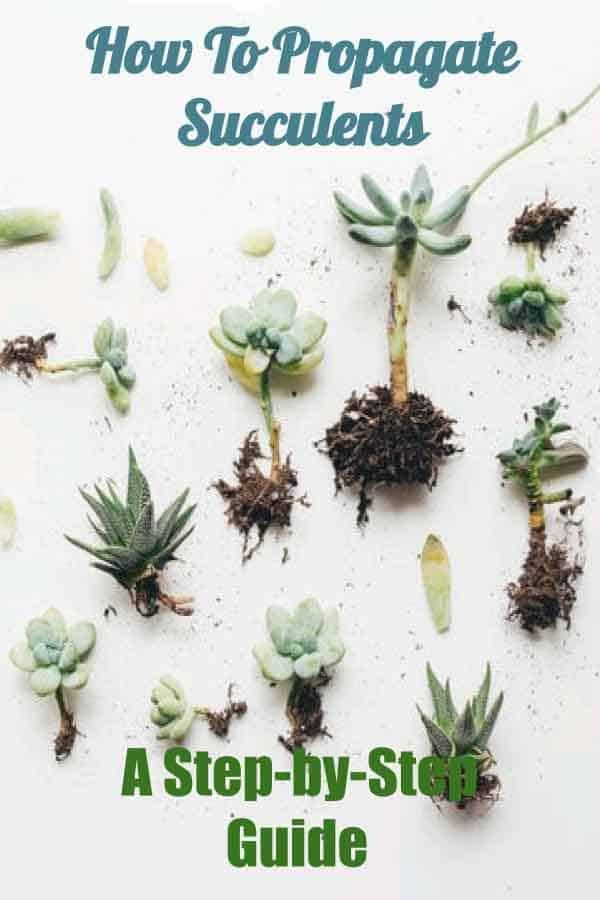
Succulents have gained immense popularity among plant enthusiasts, not only for their unique aesthetics but also for their low maintenance requirements. One of the most effective methods for expanding your succulent collection is through propagation. While there are several mediums available for this process, using perlite has become increasingly favored. This article will guide you through the intricacies of propagating succulents using perlite, ensuring you have the necessary knowledge for successful growth.
Understanding the Benefits of Propagation
Propagation is the process of creating new plants from existing ones. It allows succulent lovers to expand their gardens, share plants with friends, and explore new varieties without the financial burden of purchasing whole plants. Moreover, it can invigorate the parent plant by promoting healthier growth. The burgeoning interest in propagation has led many to explore different mediums, with perlite emerging as a popular choice.
Perlite is a volcanic glass that has been heated until it expands, resulting in a lightweight and porous material. Its unique properties make it advantageous for succulent propagation, as it promotes excellent drainage and air circulation. This medium prevents the dreaded overwatering issue, which is often the downfall of succulent growth. But it’s essential to understand how to leverage perlite effectively to improve your chances of success.
Preparing Your Propagation Station
Before embarking on your propagation journey, it is crucial to establish a suitable environment for your succulents. A well-ventilated area that receives indirect sunlight is ideal for this process. Direct exposure to harsh sunlight can damage the delicate cuttings as they root, making indirect light a better alternative.
Gather the necessary materials for successful propagation:
- Fresh perlite
- Sharp, clean scissors or a knife
- A clean container for rooting your cuttings
- Water (for misting purposes)
- Pest deterrents (optional, but recommended)
Preparing the cuttings properly from your parent succulent is critical. Choose healthy, mature leaves or stems. Using your sharp scissors or knife, make a clean cut to minimize damage. Allow the cuttings to callous, ideally for 3 to 5 days, in a dry location. This callousing process is significant as it prevents rot once the cutting is placed in perlite.
Choosing Your Perlite
While perlite is available in various forms, not all perlite is created equally. Opt for horticultural-grade perlite, as it is specifically processed to be free from contaminants that can adversely affect plant growth. The texture of perlite should resemble tiny, white pellets that allow for excellent drainage.
Some plant enthusiasts choose to mix perlite with other mediums, such as cactus soil or coconut coir, to enhance moisture retention while maintaining drainage. However, beginners might find that using pure perlite is sufficient for succulents, as they are highly tolerant of dry conditions.
Implementing the Propagation Process
With your cuttings prepared and perlite at the ready, it’s time to begin the propagation process. Follow these steps carefully to ensure optimal results:
1. Fill your container with perlite, leaving about an inch of space at the top.
2. Moisten the perlite before placing the cuttings. It should be damp but not soggy, as soggy conditions can cause rot. Mist the surface lightly to achieve this balance.
3. Insert the cuttings into the perlite, ensuring that the cut end is buried about an inch deep. Be cautious not to overcrowd the container; spacing is crucial for airflow.
4. Mist the surface lightly after placing all cuttings, ensuring the perlite maintains a damp consistency.
5. Provide your newly propagated cuttings with the appropriate lighting conditions. Keep them in a spot with ample indirect sunlight, as this helps stimulate root growth without the risk of sunburn.
Monitoring Growth and Encouraging Roots
Patience is an essential virtue when propagating succulents. It can take anywhere from a few weeks to several months for roots to establish, depending on the succulent type. During this period, monitoring the moisture levels in the perlite is essential. Avoid overwatering; the perlite allows for quick drainage, thus requiring less frequent watering.
Keep a close eye out for signs of growth, such as new leaves or root systems emerging from the base of your cuttings. As they develop, you may cautiously introduce a diluted succulent fertilizer to encourage further growth; however, stick to minimal fertilization to avoid overwhelming delicate roots.
Transplanting and Caring for Young Succulents
Once your succulents have comfortably rooted, they will be ready for transplanting. Depending on the variety, this could take around 3 to 6 weeks. Carefully extract the rooted cuttings while minimizing disturbance to their new root systems. Transplant them into individual pots or into your garden. Ensure that these new homes have suitable drainage to promote robust growth.
Post-transplant, provide the young succulents with care similar to mature plants. Monitor watering and light conditions as they acclimate to their new environment. Educating yourself on the specific species’ needs can go a long way in sustaining healthy, thriving plants.
Conclusion: Successful Succulent Propagation with Perlite
Propagating succulents in perlite is an effective method that not only supports healthy root development but also simplifies the propagation process due to its unique properties. With the right materials, careful preparation, and attentive care, novice and seasoned gardeners alike can successfully grow new succulents. By following the outlined steps, you can confidently expand your succulent collection and enjoy the vibrant beauty they bring to your space.


Leave a Comment