Short Answer
Aloe vera plants are not just visually appealing; they also possess remarkable medicinal properties. Many enthusiasts cherish these succulent plants for their soothing gel, which has a myriad of uses—from skin care to digestive health. However, cutting an aloe vera plant can be more art than science. Have you ever wondered what the best techniques for cutting and caring for your aloe vera are? The task might appear straightforward, yet there are common pitfalls that could thwart your success.
In this guide, we will explore the best practices for cutting an aloe vera plant to ensure its longevity and vitality. We’ll delve into essential techniques, care tips post-cutting, and how to creatively incorporate your aloe vera in daily life.
Before diving into the specifics of cutting techniques, it’s imperative to understand the structure of the aloe vera plant. The plant comprises fleshy leaves that store moisture, which is vital for its survival. Observing these characteristics can mitigate potential challenges that arise during and after cutting.
Understanding the Anatomy of an Aloe Vera Plant
To effectively cut your aloe vera, you must first familiarize yourself with its anatomy. The leaves are not just decorative; they are reservoirs of nutrients and moisture. Typically, aloe vera plants grow rosettes of leaves, which can vary in size, shape, and color.
Be aware that these leaves contain sap that can be irritating to some individuals. This is crucial to know before you initiate any cutting action. Wearing gloves can safeguard your hands from any potential allergic reactions.
In addition, it’s beneficial to assess the overall health of the plant. Healthy leaves are plump and firm, while gritty or discolored leaves may signal a problem. Cutting from a healthy segment ensures that the plant remains robust.
Choosing the Right Time to Cut
Timing is of the essence when cutting aloe vera. Ideally, aim for the early morning or late afternoon when temperatures are cooler. This minimizes stress on the plant and preserves moisture.
Moreover, consider the plant’s growth cycle. Aloe vera typically grows more actively during warmer months. Cut during this period for the best outcomes. Observing your plant’s growth not only helps in determining the right timing but also informs you about the best cutting locations.
Lastly, take weather conditions into account. If you have recently watered the plant, allow the soil to dry out slightly. This prevents root disturbance when cutting and enhances recovery.
Tools of the Trade: What You’ll Need
Preparation is key to a successful aloe vera cutting experience. The right tools can make a significant difference. Gather the following items:
– A sharp, sterile knife or pruning shears: Sharp blades minimize damage to the plant.
– Gloves: Protect yourself from potential skin irritants.
– Rubbing alcohol: Sterilize your cutting tool to prevent infection.
– A clean container: If you are harvesting gel for immediate use, have a container ready on hand.
Investing in the proper tools will streamline the cutting process and encourage a smooth wound healing for your plant.
The Art of Cutting: Technique Matters
Now that you’re equipped and ready, let’s discuss cutting techniques. The goal is to minimize damage to the plant while maximizing your yield of usable segments.
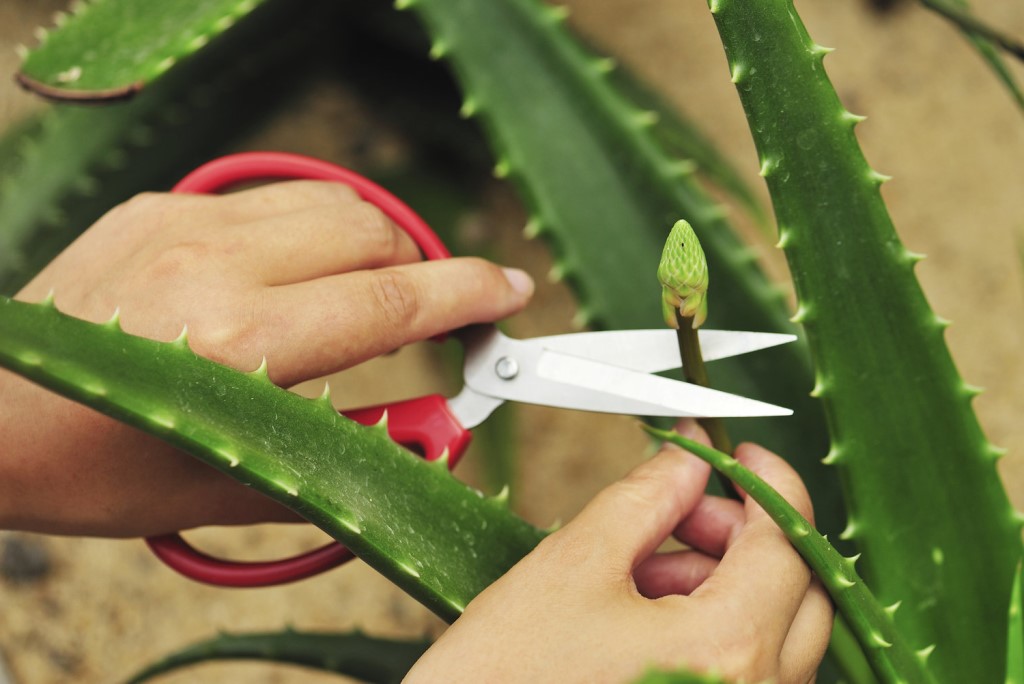
Begin by identifying the leaves you wish to cut. It’s prudent to choose the outermost leaves, as they are typically the most mature. Using your sterile cutting tool, make a clean cut as close to the base of the leaf as possible. This technique minimizes the chance of injury to the plant itself.
Once you’ve cut the leaf, the next step involves harvesting the gel. Carefully slice open the leaf lengthwise and scoop out the gel within. It’s essential to avoid the green outer layer, as it contains substances that may vary in effects depending on your use.
As you cut, consider cleaning up any sap that oozes out. This ensures the plant remains healthy and promotes faster healing.
Post-Cutting Care for Your Aloe Plant
After cutting, how you care for your aloe vera can have lasting effects on its health. First, avoid excessive watering immediately after the cut. Allow the cut area to callous over for a couple of days before resuming your regular watering schedule. This assists in preventing rot and decay.
Monitor the plant closely in the days following the cut. Look for signs of distress, such as wilting or discoloration, and adjust your care accordingly. If you notice any irregularities, consult reliable sources or experts on appropriate pest control and care.
Furthermore, consider feeding your aloe vera with a diluted fertilizer suited to succulents. This can help replenish nutrients that may have been depleted due to the cut. It’s best to fertilize in moderation to prevent overwhelming the plant.
Incorporating Your Aloe Vera: Creative Uses
Finally, with your aloe vera in prime condition post-cutting, it’s time to explore how to integrate this versatile plant into your everyday life. The gel harvested can serve many purposes, from soothing sunburns to enhancing skincare routines. Aloe vera can even be incorporated into smoothies or used as a hair conditioner. The potential uses are limited only by your creativity.
In conclusion, cutting an aloe vera plant is a relatively straightforward process that can become intricate with improper techniques and care. By understanding the plant’s anatomy, timing your cuts appropriately, and following best practices post-cutting, you lay the foundation for a flourishing aloe vera. Embrace the world of plant care with confidence, and relish in the benefits of having a healthy aloe vera plant in your home.
FAQ
When is the best time to cut an aloe vera plant?
The best time to cut an aloe vera plant is in the early morning or late afternoon during warmer months, when the plant is actively growing and temperatures are cooler to minimize stress.
What tools do I need to cut an aloe vera plant safely?
You need a sharp, sterile knife or pruning shears, gloves to protect from sap irritation, rubbing alcohol to sterilize tools, and a clean container to collect the gel.
How should I care for my aloe vera plant after cutting?
After cutting, allow the cut area to callous over for a few days before watering to prevent rot, monitor for signs of distress, and consider applying diluted fertilizer suited for succulents.
Can the gel from aloe vera leaves be used immediately after cutting?
Yes, the gel can be harvested immediately after cutting by slicing open the leaf lengthwise and scooping out the gel, avoiding the green outer layer.
Are there any safety precautions when cutting aloe vera?
Yes, aloe vera sap can irritate skin, so wearing gloves is recommended to avoid allergic reactions.

Leave a Reply