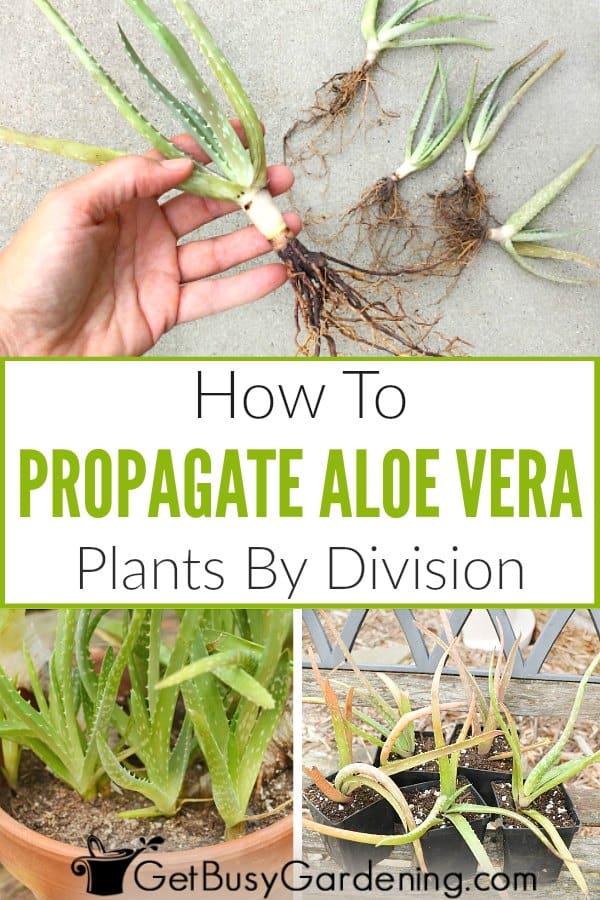
Aloe vera, with its succulent leaves and myriad of beneficial properties, is a favorite among plant enthusiasts. This hardy succulent not only serves as a decorative houseplant but also boasts impressive medicinal qualities. Propagating aloe vera from a leaf cutting is a fascinating endeavor that allows you to explore the wonders of plant biology. In this guide, we shall navigate through the intricate process of leaf propagation, shedding light on techniques and fostering an appreciation for the resilience of this remarkable plant.
Understanding the Anatomy of Aloe Vera Leaves
Before diving into propagation, it’s important to understand the structure and physiology of aloe vera leaves. Each leaf is comprised of three layers: the outer skin, often waxy and resistant to water loss, the fleshy gel-like interior filled with nutrients, and the inner layer which contains vascular tissue responsible for nutrient transport. This anatomy allows aloe vera to store water efficiently and thrive in arid conditions. When considering propagation, the ideal cutting should be taken from a healthy, mature plant, ensuring optimal chances for root formation.
Choosing the Right Leaf for Propagation
Selection is pivotal in the propagation process. A healthy leaf should exhibit vibrant green coloration, firm texture, and no signs of disease or damage. The ideal candidate for a cutting is a lower leaf, as they’re typically more mature and have better chances of sprouting roots. Cutting a leaf that is too young or too old may yield less than satisfactory results. Additionally, always utilize clean, sharp tools for the cutting process. This action minimizes the risk of introducing pathogens to your aloe plant.
Executing the Perfect Leaf Cutting
With your chosen leaf in hand, it is time to prepare for the actual cutting. Begin by positioning the leaf carefully to maximize your yield. Use a sharp knife or scissors to make a clean cut, ensuring to slice it at the base where it attaches to the plant. After the leaf is severed, allow it to sit in a dry area for approximately 24 to 48 hours. This crucial step enables the cut end to callous over, reducing the likelihood of rot once planted.
Selecting the Right Medium for Root Growth
While the potential of your leaf cutting is promising, the medium in which it is planted plays a significant role in determining its success. A well-draining potting mix, specifically formulated for succulent plants, is ideal. This mix typically contains a combination of potting soil, sand, and perlite or pumice, allowing for excellent drainage while retaining essential moisture. Avoid conventional potting soils, as they tend to hold too much water, which can lead to severe damage or decay.
Planting the Leaf Cutting
Once the cut end has dried and you have your potting mix prepared, it is time for the exciting step of planting. Fill a small pot with the well-draining mixture. Create a hole deep enough to support the cut end of the leaf without forcing it into the medium. Gently place the leaf into the hole, ensuring it is positioned upright. Lightly pack the soil around the base to provide some support but avoid excessive pressure that could damage the cut end.
Understanding Watering Requirements
Aloe vera is particularly forgiving when it comes to watering, yet during the early stages of root development, it is essential to strike a balance. After planting, water the soil slightly to initiate the rooting process, but avoid drenching it. This initial moisture encourages the cutting to establish roots while preventing rot. As a rule of thumb, the soil should always be allowed to dry out completely between waterings. This practice applies to all succulents, including aloe, as they thrive in drier conditions.
Creating the Ideal Environment
Optimal lighting is crucial for the growth of your aloe leaf cutting. Ideally, place the pot in a location that receives bright, indirect sunlight. Direct sunlight can be too intense, potentially scorning the delicate cutting. A sunny windowsill that filters harsh rays is a perfect spot. Additionally, maintaining a warm temperature, ideally between 60°F to 75°F (15°C to 24°C), will further enhance the chances of successful propagation.
Monitoring Progress and Patience
As time progresses, the anticipation of sprouting roots and new growth will build. Roots typically take anywhere from three weeks to a few months to develop, depending on conditions. During this waiting period, observe the leaf for any signs of growth or decay. It’s critical to maintain an open eye on moisture levels; if the cutting begins to wither or mold, reassessing your care routine may be necessary. Patience is paramount in this process, and understanding that nature works at its own pace will cultivate a deeper connection with your plant.
Encouraging Growth Post-Rooting
Once roots have formed, the cutting can be treated similarly to a mature aloe plant. Gradually reintroduce regular watering and consider re-potting into a larger container to promote further growth. At this stage, your aloe vera is now a symbol of your efforts and care, transitioning from a mere leaf to a thriving, resilient plant. Celebrate your success and the beauty of plant propagation, knowing that every new leaf signifies your journey in cultivating life.
Conclusion: The Reward of Patience and Care
In conclusion, propagating aloe vera from a leaf cutting is not just an exercise in gardening; it is a testament to nurturing life through patience and dedication. By understanding the intricacies of the propagation process, you will cultivate not only new plants but also a profound appreciation for the resilient nature of succulents. Embracing the challenges and joys of propagation opens a world of possibilities, inviting you to delve deeper into the remarkable kingdom of plants. Let each new growth serve as a reminder of the connection between you and the botanical world, sparking curiosity and a desire for further exploration.


Leave a Comment