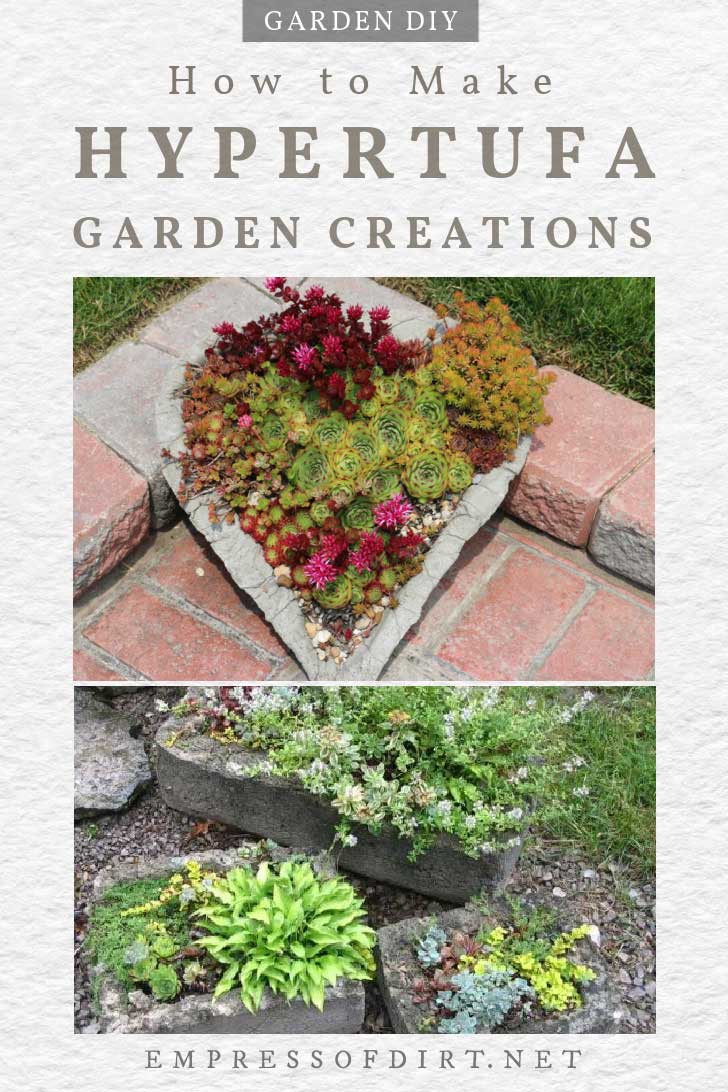
Hypertufa pots have gained immense popularity among gardening enthusiasts due to their rustic charm and lightweight durability. This innovative composition allows for diverse planting options, especially for cacti and succulents. This guide aims to provide a comprehensive overview on how to create hypertufa flower pots at home, addressing essential concerns such as cost-effectiveness, ease of maintenance, and environmental sustainability.
Hypertufa is a man-made material that mimics the appearance of natural stone. It is composed of Portland cement, perlite or vermiculite, and peat moss. This blend not only ensures a porous structure but also enhances the insulation properties necessary for plant health. Following this guide will empower you to make your hypertufa pots effortlessly.
Understanding the Materials Required
Before embarking on your hypertufa project, it’s essential to gather all the necessary materials:
Portland Cement: This is the primary binding agent for your hypertufa mixture. It provides strength and stability to the final product.
Perlite or Vermiculite: These components contribute to the lightweight characteristic of hypertufa pots while ensuring adequate drainage, which is particularly beneficial for plants susceptible to overwatering.
Peat Moss: This organic material enriches the mix with nutrients and promotes moisture retention, making it ideal for various flowering plants.
Water: This essential element activates the cement, helping combine the ingredients into a workable paste.
Optional Additives: You can incorporate items like sand for added texture or even color pigments for a unique aesthetic appeal.
Preparation is Key
Prepping your workspace is crucial before diving into your hypertufa pot creation. Choose a well-ventilated area, preferably outdoors, to avoid inhaling cement dust. Consider laying down a drop cloth to protect the surface and gather all necessary tools. These include mixing containers, a trowel, gloves, and a mold to shape your pots. The mold can be made from plastic or even cardboard, depending on the desired shape and size.
Creating Your Hypertufa Mixture
Start by mixing dry components in equal parts:
– Two parts Portland cement
– One part perlite or vermiculite
– One part peat moss
Gradually add water to the mixture, stirring until it reaches a thick, mud-like consistency. Care should be taken not to overwater; the mixture should hold together when squeezed but not be pouring wet. This balancing act is essential for ensuring the structural integrity of your flower pot.
Shaping the Hypertufa Pot
Once your mixture is ready, begin packing it into your chosen mold. Press the mixture firmly, ensuring there are no air pockets. Aim for uniform thickness, ideally around an inch, which will provide adequate durability while maintaining a lightweight structure. For added design, consider using two nested molds — one for the outer wall and one for the inner cavity — to create diverse textures and effects.
Be conscious of the drainage holes. If you’re crafting a pot for cacti or succulents, drilling or puncturing holes in the bottom of your mold before filling it with the mixture is crucial. Proper drainage prevents water accumulation and promotes healthy root development.
Allow Your Pots to Cure
After shaping, it’s essential to allow the hypertufa pots to cure for at least 24 to 48 hours. During this time, moisture will evaporate, and the pots will solidify. To prevent cracks during the drying process, wrap the molds in plastic sheeting to maintain humidity, checking regularly. After the initial curing period, remove the pots gently to avoid damage, then leave them to cure for an additional two to three weeks in a shaded area, ensuring they are turned regularly to promote even drying.
Enhancing Aesthetics with Finishing Touches
Once fully cured, you may wish to enhance the natural look of your hypertufa pots. Some options include:
Sealing: You can apply a sealant to your pots to improve longevity and add a glossy finish.
Painting: Consider using mineral-based paints for a color boost that is both environmentally friendly and durable.
Texturing: Create patterns or designs by using various tools before the mixture cures completely.
Planting in Hypertufa Pots
These pots offer excellent drainage and aeration, making them ideal for cacti and other drought-tolerant plants. To plant, fill the bottom of the pot with a well-draining soil mix, place your chosen plants, and then top with decorative gravel or stones for added visual appeal. The porous nature of hypertufa allows for airflow, which helps prevent root rot while providing a stable environment for your plants to thrive.
Maintaining Your Hypertufa Pots
One of the primary advantages of hypertufa pots is their low maintenance requirements. Ensure that you monitor moisture levels, especially during dry spells, as the pot’s porous structure will wick away water quickly. In the spring, consider refreshing the soil to keep nutrients at optimal levels.
In conclusion, making hypertufa flower pots at home is not only a rewarding DIY project but also a sustainable way to cultivate beautiful plants. By following these steps and understanding the key aspects of hypertufa, you can enjoy creating unique planters that enhance your gardening experience while addressing concerns such as practicality, durability, and environmental impact. Dive into this project, and let your creativity flourish!


Leave a Comment