When it comes to caring for cacti, enthusiasts often find joy in their resilience and striking beauty. However, even the most ardent cactus aficionados occasionally face a significant hurdle: root rot. This affliction can gradually creep in, transforming an otherwise healthy plant into a victim of neglect and misunderstanding. Understanding how to save a cactus rotting from the bottom is crucial for preserving these prickly wonders.
Root rot is characterized by the decay of the root system, primarily caused by overwatering or poor drainage. This condition can lead to a variety of symptoms that are distressing to observe, such as yellowing or wilting plants, foul odors from the soil, and, in severe cases, the complete collapse of the plant. The allure of cacti is in their ability to thrive in arid environments, yet they remain susceptible to the very opposite of their ideal conditions.
The following sections detail strategies for both preventing and fixing root rot, arming you with the knowledge to protect your cherished cacti.
Understanding Root Rot: The Symptoms and Causes
Recognizing root rot early is pivotal for effective intervention. The symptoms typically manifest in various forms:
– **Discolored Leaves:** One of the first signs of distress, leaves may start turning yellow or brown, particularly around the base.
– **Softens Stems:** Healthy cactus flesh feels firm. If you notice a mushy texture, this often signals internal decay.
– **Unpleasant Odor:** A predominant smell emanating from the soil or the roots can indicate bacterial action and rotting material.
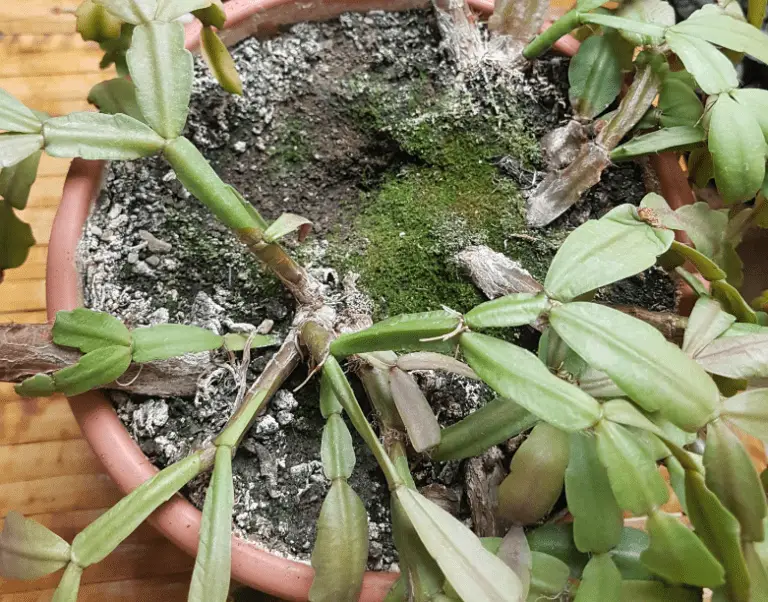
– **Fungal Growth:** The presence of mold or other fungi on the soil surface is a visual cue that your cactus may suffer from rot.
While the roots are the compromised section, these signs are often above the surface. Root rot is predominantly caused by excessive moisture. Overwatering is a common pitfall, as many perceive a need to frequently water their plants. Additionally, using soil that retains moisture—such as garden soil or potting mixes not tailored for cacti—can lead to drainage issues. Sometimes, infections can arise from physical damage to roots or from pathogens introduced by unsterilized gardening tools.
Preventing Root Rot: Best Practices for Cactus Care
Prevention begins before symptoms arise. With knowledge and adequate care measures, you can significantly reduce the risk of root rot:
– **Soil Selection:** Use a well-draining cactus mix or create your own with a blend of sand, perlite, and potting soil. This composition ensures moisture passes through swiftly, allowing the roots to breathe.
– **Pot Choice:** Choose pots with sufficient drainage holes. Terracotta pots are particularly effective as they can wick moisture away from the roots, providing a protective environment against rot.
– **Watering Wisdom:** Employ the “soak and dry” method: water deeply and then allow the soil to dry out completely before the next watering. Season, temperature, and humidity impact how often you’ll need to water—so remain vigilant. During winter dormancy, reduce watering significantly.
– **Sunlight Exposure:** Ensure your cactus gets ample sunlight, which helps the plant photosynthesize and dry out excess moisture in the soil. Ideally, place your cactus in a location with direct sunlight for several hours daily.
Proper watering practices combined with an appropriate environment and soil composition create an ideal habitat for your cactus to thrive.
Intervening in Root Rot Situations: A Step-by-Step Guide
If root rot has already set in, immediate action is necessary. Here’s a comprehensive approach to salvaging your cactus:
– **Remove the Cactus:** Start by gently taking the cactus out of its pot. Handle it with care to avoid additional damage. Lay it on a soft surface to minimize stress.
– **Inspect the Roots:** Examine the root system thoroughly. Healthy roots should be white or light tan and firm. Trim away any dark, mushy, or mushy roots. Use sterilized scissors to prevent introducing pathogens.
– **Drying Period:** Let the cactus and remaining healthy roots dry for a day or two. Place it in a warm, dry area out of direct sunlight. This waiting period allows wounds to heal and callsus to form over any cuts.
– **Repot Effectively:** After the drying period, repot your cactus in fresh, well-draining soil. If possible, choose a pot that is only marginally larger than the original container to prevent excess soil, which can retain moisture.
– **Post-Repotting Care:** In the initial weeks post-repotting, refrain from watering. Monitor the cactus’s condition, ensuring it is in a bright location. If the cactus begins showing signs of recovering, gradually reintroduce watering practices.
The path to rescuing a cactus from root rot requires diligence and knowledge. By integrating preventative measures and knowing how to react once symptoms arise, enthusiasts can foster a sustainable and thriving cactus collection. The resiliency of cacti can mirror their care: with appropriate attention and understanding, they embody an enduring beauty that thrives in even the most unforgiving conditions.


Leave a Comment