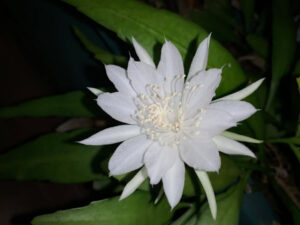
The allure of the Christmas cactus, with its resplendent blooms and easygoing disposition, captivates many holiday enthusiasts. Unlike traditional cacti, this succulent brings a burst of color to your home during winter months, creating a lively contrast against the cold, muted landscape outside. For those looking to propagate this enchanting plant, starting from a cutting is an approachable method. Let us delve into the transformative process of cultivating a Christmas cactus from a cutting, unveiling each step with precision.
Understanding the Biology of the Christmas Cactus
The Christmas cactus, scientifically known as Schlumbergera, is native to the lush rainforests of Brazil. It thrives in humid environments, boasting segmented stems that store water efficiently, allowing the plant to flourish in its natural habitat. This unique structure is essential in the propagation process, as it allows cuttings to establish roots rapidly, making success more attainable than with many other plant varieties. Each segment, often called a “leaf,” can produce new growth, thus complicating the common misconception that each cutting must start with an entire stem.
Timing Your Cutting: The Optimal Season for Propagation
Timing is paramount when propagating a Christmas cactus. The ideal period for taking cuttings is during the late spring to early summer. This timeframe aligns with the plant’s natural growth cycle, providing ample opportunity for robust root development. During these months, the temperatures are warm, and the humidity levels are higher, mimicking the cactus’s native environment.
It’s crucial to avoid cuttings when the plant is blooming or during dormancy in the fall and winter months. Blooming places immense energy demands on the plant, which can inhibit root formation in cuttings. Post-bloom, allow a resting period before initiating propagation.
Harvesting Your Cutting: Technique Matters
When you have determined the ideal time for harvesting, the next step involves selecting a healthy segment from a well-established plant. Utilizing sharp, sterile scissors or pruning shears, cut a segment consisting of two to three leaf “joints.” This ensures that the cutting has enough structure to sustain itself while waiting for roots to form. After cutting, let your segment callous over for a few hours or overnight. This crucial step will help reduce the possibility of rot once the cutting is placed in soil.
Preparing the Right Environment: Soil and Container Selection
The medium where your cutting will thrive plays an essential role in successful propagation. A well-draining potting mix specifically formulated for cacti and succulents is ideal, as it prevents the plant from retaining excess moisture, which can lead to root rot. You can also create your own mix using a combination of perlite, coarse sand, and potting soil. The perlite enhances aeration, while the coarse sand mimics the gritty habitat of the cactus in the wild.
Select a small-sized pot with drainage holes to facilitate proper water management. The limited space will encourage the plant to focus on root development rather than excess foliage growth, enabling a more vigorous establishment.
Planting Your Cutting: Steps to Success
Once your cutting has calloused and your potting mix is prepared, it is time to plant. Make a small hole in the substrate with your finger or a pencil and gently place the end of the cutting into the soil. Ensure that at least one or two leaf segments are buried, as this will facilitate root emergence from the cutting. Firm the soil around the cutting to stabilize it while avoiding excessive pressure that could damage delicate tissue.
Watering and Initial Care: A Fragile Beginning
After planting, refrain from watering immediately; the callous end needs to form a protective layer over the cutting to prevent water absorption that could lead to decay. Wait about a week before giving your cutting a brief drink of water. During this time, place the pot in a warm, brightly lit area with indirect sunlight. Too much direct sunlight can scorch the tender cutting, while inadequate light can stymie its growth.
Once roots have developed, indicated by new leaf growth, increase your watering frequency but remain cautious. Water once the top inch of soil feels dry. The Christmas cactus prefers a slightly drier environment, mirroring its rainforest adaptation.
Encouraging Growth: Fertilization and Light Exposure
After your Christmas cactus starts to establish itself and shows signs of new growth, it may benefit from periodic fertilization. Utilize a balanced, diluted liquid fertilizer every four to six weeks during the growing season. However, avoid fertilizing during the dormancy period in fall and winter. For optimal lighting, continue to provide bright, indirect sunlight, balancing their need for brightness with the risk of sunburn.
Patience is Fundamental: The Waiting Game
Successfully propagating a Christmas cactus from a cutting requires time and adherence to specific care guidelines. Within several weeks to a few months, you should observe signs of robust growth if the conditions are favorable. Delight in the foliage, knowing it is a product of your nurturing efforts.
In conclusion, starting a Christmas cactus from a cutting offers a rewarding opportunity to share this vibrant plant with friends and family or to enrich your own collection. With attention to detail and an understanding of its unique requirements, you can navigate the propagation journey with confidence, watching your efforts blossom with each passing day.


Leave a Comment