Planting Aloe Vera Cuttings: A Simple How-To Guide
Aloe Vera has long been esteemed for its myriad health benefits, boasting both decorative appeal and practical utility. However, while many admire this succulent for its fleshy leaves that harbor a clear, soothing gel, fewer realize that propagating Aloe Vera cuttings offers an engaging and fulfilling horticultural endeavor. This guide delineates the nuanced process of planting Aloe Vera cuttings, ensuring that even novice gardeners can cultivate their own lush plants with competence and confidence.
Understanding Aloe Vera Cuttings: The Propagation Fundamentals
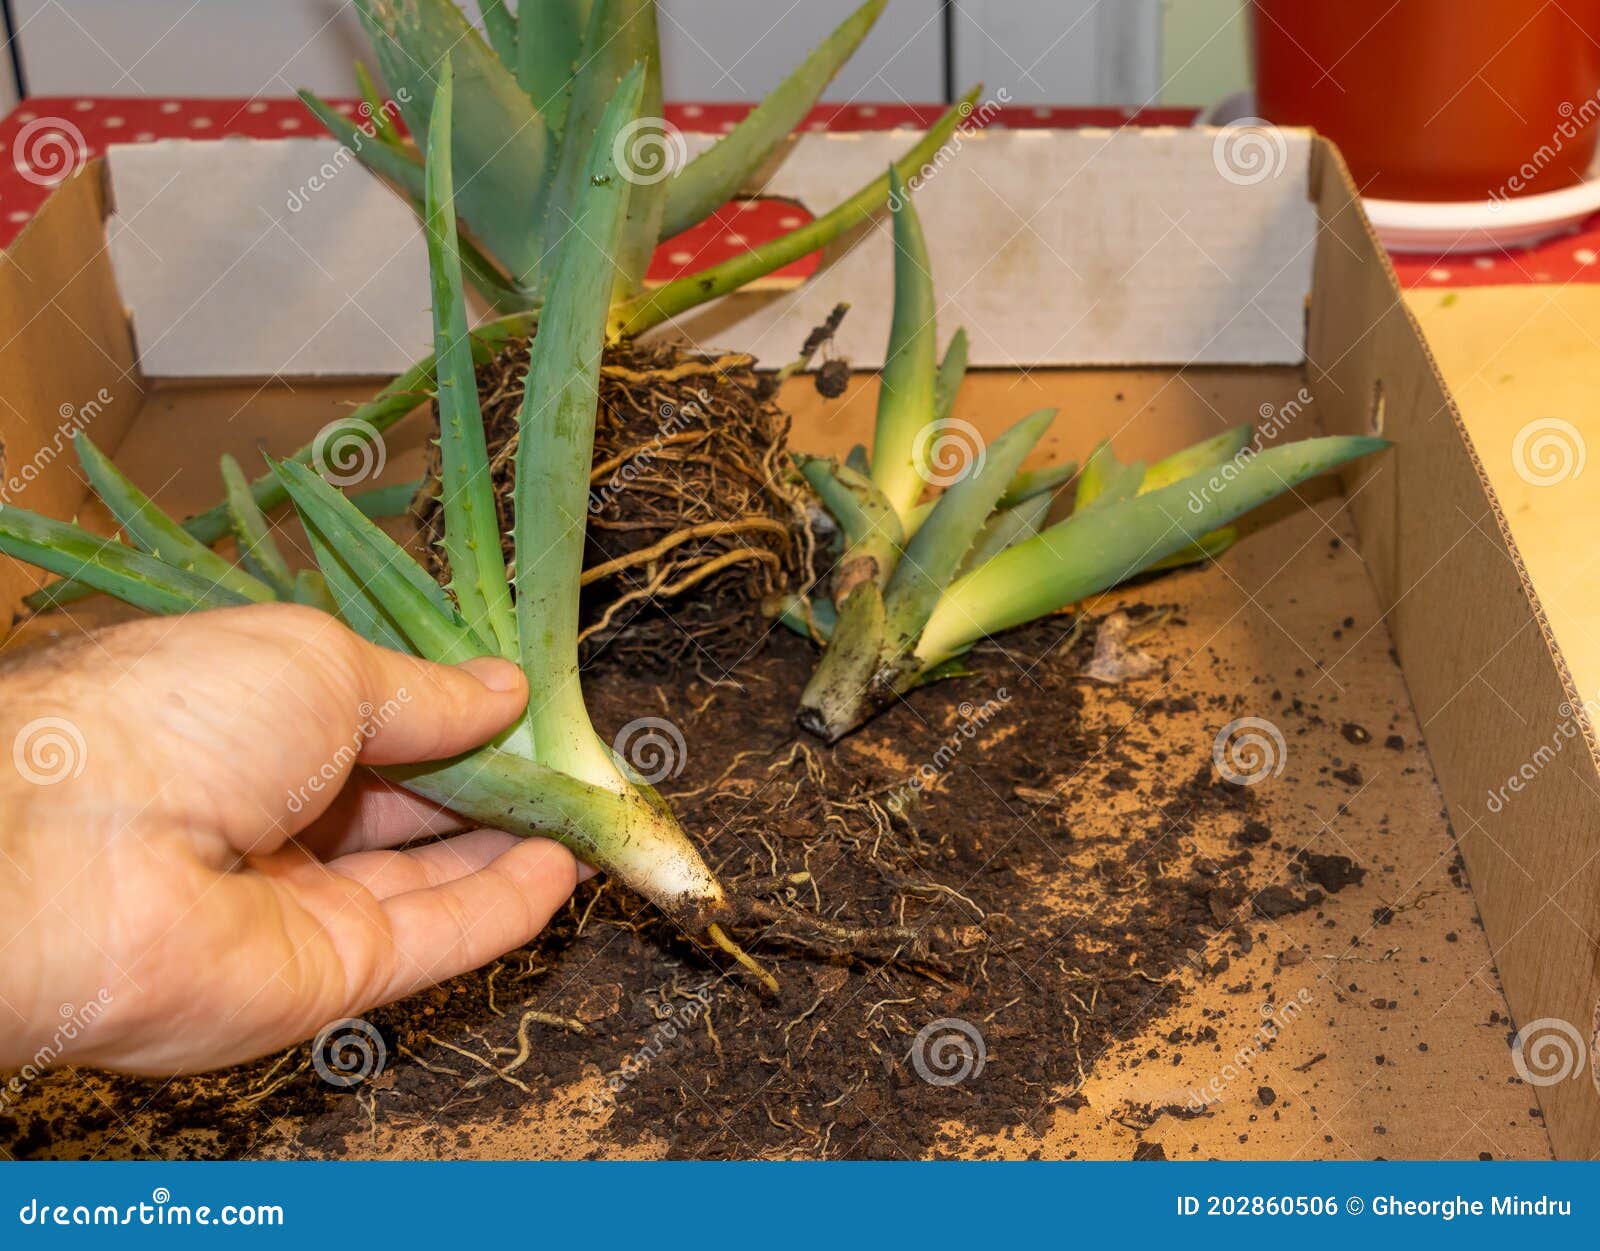
Before embarking on the propagation journey, it is essential to comprehend the nature of Aloe Vera cuttings. Aloe Vera plants flourish in arid environments, adapting the ability to store water in their leaves. When selecting cuttings for propagation, consider the following:
1. **Selecting the Right Cutting:** Choose healthy, mature leaves for cuttings. Ideally, these should be plump, vibrant, and free of any blemishes. The best cuttings often come from the lower sections of the plant, where growth is more robust.
2. **Optimal Timing:** The time of year also plays a pivotal role in the success of Aloe Vera propagation. Late spring to early summer is typically the most favorable period, as the plant is entering its active growing phase. This ensures that cuttings can take root efficiently and thrive.
3. **Factor in Preparation:** Proper preparation of the cuttings is crucial. After selecting the leaves, let them dry for several hours, or ideally one to two days, in a shady area. Allowing the cut ends to callous over minimizes the risk of rot when planted.
The Art of Planting: Step-by-Step Process
Once the cuttings are adequately prepared, the next step involves the actual planting process. This simple, systematic approach will set the foundation for healthy growth:
1. **Choosing the Appropriate Container:** Select a container with adequate drainage holes at the bottom to facilitate excess moisture escaping. Terracotta pots are favored for their breathability, but any pot with drainage will suffice.
2. **Utilizing the Right Soil Mix:** Aloe Vera thrives in well-draining soil. A commercial cactus or succulent mix can provide an optimal environment, or you can create your own mix using equal parts potting soil, sand, and perlite. This ensures air circulation around the roots while retaining essential moisture.
3. **Planting the Cutting:** Create a small hole in the soil with your finger or a stick. Gently place the cutting into the hole, ensuring that at least one to two inches of the cutting is buried. Firm the soil around the base while being careful not to damage the cutting.
4. **Watering Wisely:** After planting, light watering is recommended. Use a spray bottle to mist the soil lightly, promoting moisture without overwhelming the cutting. Overwatering is a common mistake that can lead to rotting.
Establishing the Optimal Environment: Care Guidelines
Post-planting, establishing the right environment is crucial for the success of your Aloe Vera cuttings. Here are key factors to consider:
1. **Light Conditions:** Aloe Vera requires bright, indirect sunlight. Position the container near a window that allows for filtered light. Direct sunlight may scorch the delicate cuttings, while too little light could inhibit growth.
2. **Temperature Regulations:** Aloe Vera prefers temperatures between 60°F to 75°F (15°C to 24°C). Ensure that the environment is stable and avoid exposing the cuttings to extreme temperature fluctuations, especially drafts or chilly drafts.
3. **Monitoring Moisture Levels:** The frequency of watering can significantly impact the rooting of the cuttings. Monitor the moisture levels in the soil; it is essential to allow the soil to dry out completely between waterings. A well-timed watering schedule will facilitate robust root development.
4. **Fertilization Techniques:** Initially, fertilization is unnecessary for newly planted cuttings. However, once roots are established—typically after four to six weeks—consider utilizing a diluted cactus fertilizer to provide essential nutrients as growth accelerates.
The Journey of Growth: Patience and Observation
As the days and weeks progress, observing the transformation of your Aloe Vera cuttings can be a source of immense satisfaction. With due diligence, your cuttings will begin to sprout new growth at the base, signaling the establishment of roots and a promising life ahead. Here’s what to look for:
1. **Signs of New Growth:** Monitor for tiny shoots or leaves emerging near the base of the cutting. This is an encouraging indication that your cuttings are thriving and rooting effectively.
2. **Repotting When Necessary:** As your Aloe Vera grows, you may need to repot it once established. Select a larger container and repeat the careful soil and watering practices to accommodate the growing roots.
3. **Long-Term Care Considerations:** Once your Aloe Vera reaches maturity, continue to provide appropriate light, temperatures, and watering. With proper care, these remarkable plants can thrive for years, producing offsets or “pups” that can be propagated further.
In conclusion, planting Aloe Vera cuttings is not merely a gardening task; it is an adventure in nurturing and growth. Embrace this process, and you will not only end up with beautiful plants but will also gain skills and experiences that deepen your connection to the botanical world. Immerse yourself in this splendid journey, and watch as tiny cuttings evolve into magnificent Aloe Vera plants that can enrich your life and space.


Leave a Comment