Aloe vera, a succulent often lauded for its myriad of skin benefits, also offers a rewarding opportunity for plant propagation. The ability to propagate aloe from leaves is an accessible venture for both novice gardeners and seasoned horticulturists alike. This guide delves into the intriguing art of aloe propagation, exploring its aesthetic appeal and practical benefits.
Before embarking on the propagation journey, it is pivotal to understand the unique characteristics of the aloe plant. Aloe vera thrives in arid environments, characterized by fleshy, water-storing leaves. These leaves serve not only as a reservoir of hydration but also as a strategic vessel for the propagation process. Engaging with this plant offers insights into its natural resilience and fosters a deeper appreciation for botanical growth.
To ensure successful propagation, one must gather a few essential materials. These include a healthy aloe plant, sharp shears or a knife, a clean surface for cutting, and a potting medium designed for drainage, such as a cactus or succulent mix. Selecting the right components is crucial, as they contribute significantly to the health of the newly propagated plant.
Once you have assembled the necessary tools, it’s time to carefully select the right leaves for propagation, a step that warrants attention and scrupulous judgment.
Choosing the Ideal Leaves for Propagation
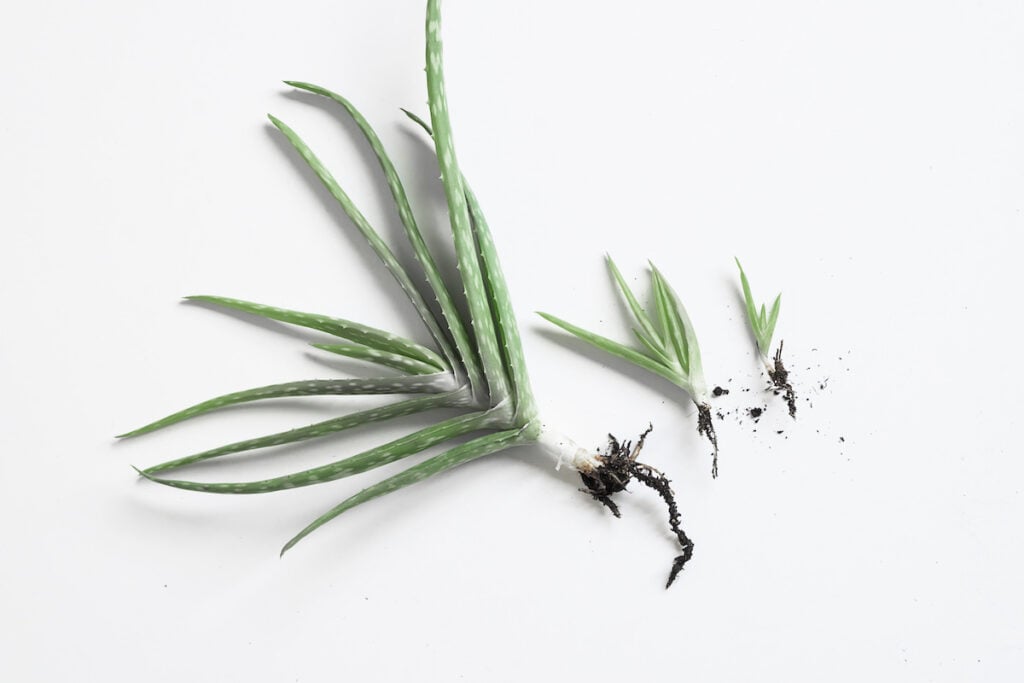
When selecting leaves for propagation, opt for those that are mature and healthy. They should be plump, devoid of blemishes, and resilient to the touch. Avoid any leaves that exhibit signs of rot or damage, as these imperfections can detract from the overall health of the new plants. The ideal leaves for propagation are typically those that lie between younger, more tender leaves and the outer, oldest leaves, striking a perfect balance between maturity and vitality.
It’s crucial to note that while some gardeners may recommend propagating from leaves, aloe vera tends to propagate more reliably from offsets or pups, the small plantlets that sprout around the base of the mature plant. Nevertheless, for the adventurous spirit, attempting leaf propagation adds an intriguing layer to the gardening experience.
Once you have selected your leaves, it’s time to snip them. Precision is critical at this juncture to prevent damage to the parent plant.
Cutting and Preparing the Leaves
Take your sharp shears or knife and make a clean cut at the base of the leaf, ideally at a 45-degree angle. This technique not only minimizes the open wound but also encourages a more effective rooting process. After cutting, it is prudent to allow the leaves to ‘callous’ for a few days in a dry, warm location. This phase is essential; it helps to prevent rot when the leaves are eventually planted. The callousing process continues to highlight the anatomical resilience of aloe plants, allowing them to thrive in challenging environments.
While waiting for the leaves to callous, prepare your potting medium.
Preparing the Potting Medium
Use a well-draining potting mix suitable for succulents or cacti. This medium allows excess moisture to escape, reducing the risk of rot. You may consider adding sand or perlite to standard potting soil, enhancing its drainage capabilities. Fill your pots or containers with this mix, leaving just enough space for the leaves to be inserted without crowding.
Once callousing is completed, plant your aloe leaves in the prepared medium. It’s important to position them upright, ensuring that the cut end is inserted just a few inches into the soil. Avoid burying them too deeply, as this can impede rooting.
Watering and Caring for Your New Aloe
After planting, it’s crucial to exercise restraint in watering. Overwatering can lead to rapid decay, particularly in the vulnerable newly planted leaves. Instead, wait several days before misting the soil lightly, allowing it to dry out completely between watering sessions. This approach mirrors the natural habitat of aloe, reinforcing its innate characteristics while nurturing its growth.
Optimal lighting conditions are also essential for successful propagation. Ideally, place your pots in bright, indirect sunlight. Direct sunlight may scorch the newly propagated leaves, while too little light can inhibit growth. Finding a harmonious balance in lighting conditions showcases the aesthetic elegance of aloe, allowing their natural beauty to flourish.
Monitoring for Growth Signs
Patience is key during the propagation process. It may take weeks or even months for roots to establish and new growth to emerge. Keep vigilant watch for signs of vitality, such as the development of new shoots or the emergence of tiny roots. Each encouraging sign is a testament to the successful propagation journey, transforming the once independent leaves into vibrant, new plants.
Conclusively, propagating aloe from leaves can be gratifying both intellectually and spiritually. The act of fostering new life from a singular leaf embodies the essence of resilience and growth. As you cultivate your propagated aloe plants, lean into the anticipation of watching them thrive, and appreciate the simple beauty that comes from nurturing nature’s wonders. This simple guide equips you with the necessary knowledge to embark on your propagation journey, merging aesthetics and practicality for a fruitful gardening experience.


Leave a Comment