
Short Answer
Ever gazed at a towering saguaro or a cluster of prickly pears and wondered, “How on earth did that majestic desert sentinel sprout from a tiny, thorny nub?” Well, my green-thumbed adventurer, the secret isn’t buried in some ancient cactus scroll—it’s tucked right there in your garden shed. Propagating cacti from cuttings is like performing botanical alchemy: a little patience, a dash of daring, and before you know it, you’re growing your own prickly empire. But beware—this isn’t a game of “plant and forget.” Oh no. The desert doesn’t reward laziness. So, are you ready to turn a humble cutting into a thorny titan? Let’s dive in.
The Art of the Cut: Selecting Your Thorny Progeny
Not all cacti are born equal in the propagation arena. Some are divas—needing exacting conditions to root—while others are as resilient as a coyote in the Mojave. For beginners, start with the easygoing crowd: Opuntia (prickly pear), Echeveria (hens-and-chicks), or Sedum (stonecrop). These species are forgiving, rooting faster than a jackrabbit on a hot griddle.
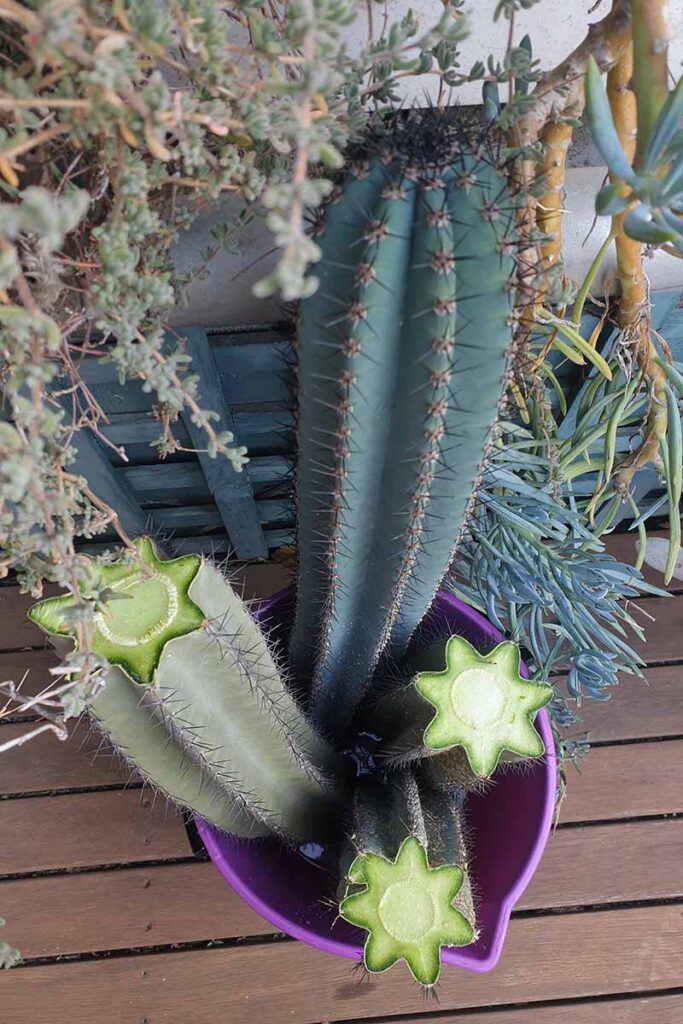
Choose a healthy, plump pad or stem—firm to the touch, with no mushy spots or sunken patches. A cutting should be at least 4-6 inches long, snipped cleanly with sterilized pruners. Avoid the temptation to yank; a clean cut prevents jagged edges that invite rot. And remember, the desert doesn’t do “one-size-fits-all.” A cutting from a columnar cactus like Carnegiea gigantea (saguaro) will behave differently than a flat Opuntia pad. Know your species, or you’ll be left scratching your head—and possibly your back.

Calloused Hearts: The Waiting Game Begins
Here’s where the magic—and the madness—begins. Freshly cut cacti are like open wounds; they’re vulnerable to rot, pests, and your well-meaning but overzealous watering habits. The first step? Let them heal. Place your cutting in a dry, shady spot for 3-7 days, or until the cut end forms a calloused scar. This isn’t just for show—it’s your cactus’s built-in bandage, sealing out moisture and bacteria like a desert fortress.
Resist the urge to stick it in soil immediately. A premature burial is the fastest way to turn your cutting into compost. Instead, think of this as a cactus’s version of a spa retreat: no water, no stress, just time to toughen up. Pro tip: If you’re propagating in humid climates, extend the drying period. Moisture is the enemy of callusing, and your cactus knows it.
Rooting for Success: Soil, Pots, and a Dash of Patience
Once your cutting is calloused and confident, it’s time to find it a cozy home. But not just any soil will do. Cacti demand a well-draining, gritty mix that mimics their native arid landscapes. Skip the fluffy potting soil; it’s about as useful as a screen door on a submarine. Instead, blend equal parts cactus/succulent soil, perlite, and coarse sand. For the truly adventurous, add a handful of pumice or chicken grit for extra aeration.
Choose a pot with drainage holes—preferably terracotta, which wicks away excess moisture like a camel in the Sahara. Bury the calloused end about an inch deep, then resist the urge to water. Yes, you read that right. Watering now is like giving a toddler a flamethrower: overkill. Instead, mist the soil lightly every few days to keep it barely damp. Your goal is to encourage root growth without drowning your cutting in its own tears.

The Waiting Game: Signs Your Cactus is Getting Cozy
Weeks may pass. The cutting may look suspiciously lifeless. This is normal. Cacti are masters of the slow burn, and root development is a clandestine affair. But how do you know if you’re on the right track? Watch for subtle clues: a slight firmness at the base (a sign of new root growth), or a gentle tug that meets resistance (your cutting is holding on for dear life). If the cutting starts to wrinkle or soften, it’s crying for water—but don’t drown it. A few drops of water every 10-14 days should suffice.
Patience is your greatest ally here. Some cacti root in a month; others take three. The key is consistency. Keep the soil on the drier side, provide bright but indirect light, and avoid the temptation to fuss. Your cutting isn’t a needy houseplant—it’s a desert warrior learning to stand on its own.
Transplanting Triumph: From Cutting to Colony
Once your cutting has developed a robust root system (test it with a gentle tug—if it resists, it’s ready), it’s time to upgrade its living quarters. Choose a slightly larger pot and repeat your gritty soil mix. Gently remove the cutting from its original pot, loosen any circling roots, and plant it at the same depth as before. Water lightly to settle the soil, then step back and admire your handiwork.
For the first few weeks, keep your new cactus in bright, indirect light to avoid sunburn. Gradually introduce it to full sun over a week or two. And here’s a pro tip: if you’re propagating multiple cuttings, space them apart in the pot. Cacti may love company, but they’re not fans of overcrowding. Give each one room to stretch its spines.

Troubleshooting Thorny Troubles
Even the most meticulous propagator faces hurdles. If your cutting turns mushy, it’s likely a victim of overwatering or poor drainage. Trim off the rotten bits, let it callous again, and start fresh with a drier mix. If the cutting wrinkles like a prune, it’s thirsty—but don’t drown it. A light misting should do the trick.
Pests like mealybugs or spider mites may also crash the party. Blast them off with a steady stream of water or treat with neem oil. And if your cutting starts to lean like the Tower of Pisa, it’s begging for more light. Rotate the pot regularly to keep it upright and even.
The Reward: A Prickly Legacy
Months from now, your cutting will have transformed into a full-fledged cactus, standing tall and proud in its pot. It may even produce offsets or blooms, a testament to your green thumb. But the real reward? The knowledge that you’ve unlocked the secrets of the desert, one thorny cutting at a time.
So, the next time someone asks how you grew that magnificent cactus, just smile and say, “It’s not magic—it’s propagation.” Then watch their jaws drop as you casually rattle off the steps like a seasoned desert sage. Because in the world of cacti, patience isn’t just a virtue—it’s the key to a thorny empire.
FAQ
What is the best method to propagate cacti from cuttings?
The best method involves selecting a healthy cutting, allowing it to callous, using a well-draining soil mix, and being patient with root development.
How long does it take for cactus cuttings to root?
Root development can take anywhere from a few weeks to several months, depending on the species and conditions.
What should I do if my cutting is turning mushy?
This usually indicates overwatering or poor drainage. Trim the rotten parts, let it callous again, and start fresh with drier conditions.

Leave a Reply