
Short Answer
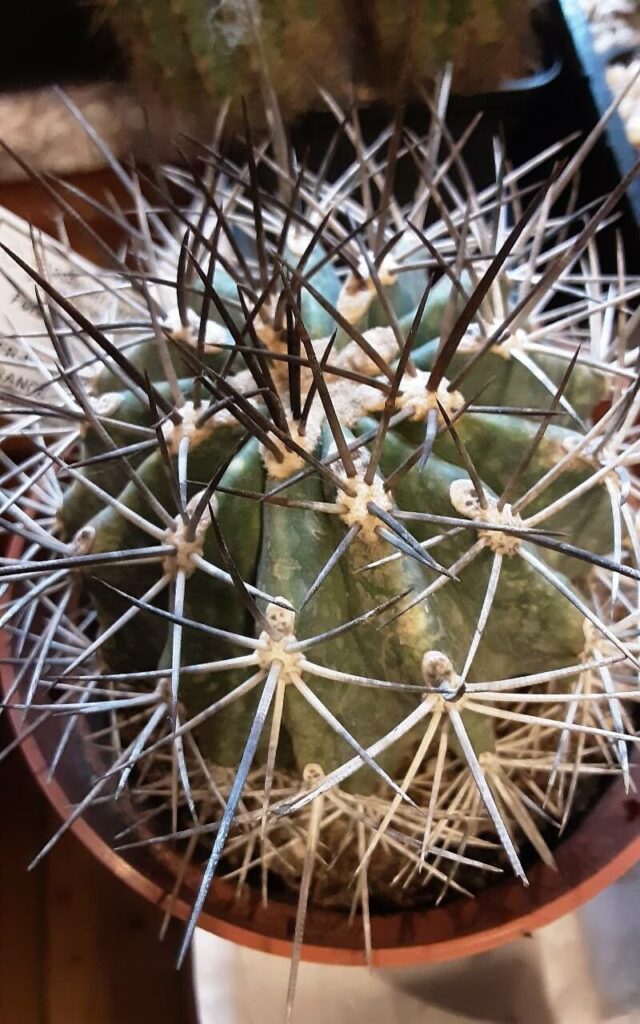
Propagating Ferocactus from offsets is a rewarding endeavor that connects you to the ancient rhythms of desert life. These resilient cacti, with their formidable spines and sunburst blooms, have thrived for millennia by mastering the art of regeneration. When you nurture an offset—a miniature clone of the parent plant—you’re not just growing a new cactus; you’re participating in a cycle of resilience, patience, and botanical alchemy. Whether you’re a seasoned horticulturist or a curious beginner, this guide will walk you through every phase of propagation, from selecting the perfect offset to celebrating its first blooms. Prepare to be enchanted by the slow, deliberate magic of Ferocactus propagation.
The Art of Offset Selection: Choosing Your Tiny Titan
Not all offsets are created equal, and discernment is key. Look for offsets that are at least one-third the size of the parent plant, with firm, plump flesh and no signs of wrinkling or soft rot. A healthy offset should feel heavy for its size, indicating adequate water storage. Avoid those with discolored or mushy spots, as these are early signs of bacterial or fungal invasion. Size matters, but so does shape: seek offsets with a symmetrical, rounded form, as irregular growth may signal underlying stress. If you’re propagating from a particularly large Ferocactus, consider using a sterilized knife to gently separate the offset, ensuring you leave a clean, unblemished wound on both the parent and the clone. Remember, the offset you choose today will shape the character of your cactus for years to come.
Timing is Everything: When to Propagate for Maximum Success
The desert doesn’t rush, and neither should you. The ideal time to propagate Ferocactus offsets is during the late spring or early summer, when the plant is emerging from its winter dormancy and entering a phase of vigorous growth. This period offers warm days and cool nights, creating the perfect conditions for root development without the stress of extreme heat or cold. Avoid propagating in the dead of winter or the scorching peak of summer, as these seasons can stunt root growth or invite rot. If you live in a region with mild winters, a greenhouse or sunny windowsill can extend your propagation window, but always monitor humidity levels to prevent excess moisture from sabotaging your efforts. Patience here is not just a virtue—it’s a necessity.
Preparing the Perfect Nest: Soil and Container Selection
Ferocactus offsets demand a soil mix that mimics their native arid habitats—fast-draining, gritty, and devoid of organic matter that could trap moisture. A blend of 60% inorganic material (such as perlite, pumice, or coarse sand) and 40% mineral-rich components (like cactus soil or turface) will provide the aeration and drainage these cacti crave. Avoid peat-heavy mixes, as they retain too much water and can lead to root suffocation. For containers, opt for unglazed terracotta pots, which wick away excess moisture and promote airflow through the soil. Ensure the pot has drainage holes—Ferocactus despises soggy feet. If you’re propagating multiple offsets, space them apart to prevent overcrowding, as competition for resources can hinder growth. Think of the container as a tiny desert oasis, where every element serves a purpose.
The Delicate Dance of Separation: Removing Offsets Safely
Separating an offset from its parent is a surgical procedure that requires precision and care. Start by gently loosening the soil around the base of the offset with a sterilized tool, such as a narrow trowel or a clean butter knife. If the offset resists, avoid yanking—this can damage both the parent and the clone. Instead, use a twisting motion to ease it free, or make a clean cut with a sterilized knife if necessary. Once separated, allow the offset to cure for 24 to 48 hours in a dry, shaded spot. This healing period allows the wound to callus over, reducing the risk of infection when it’s time to plant. Resist the urge to rush this step; even the smallest oversight can lead to rot or stunted growth. The offset is now ready to embark on its journey as an independent desert dweller.
Planting with Purpose: Setting the Stage for Root Development
Planting a Ferocactus offset is less about burying it and more about creating a foundation for its future. Dig a shallow hole in your prepared soil mix, just deep enough to support the offset without burying its base. Position the offset so that the callused wound faces downward, which encourages roots to grow outward rather than inward. Gently press the soil around the base to secure the offset, but avoid compacting it—Ferocactus roots need space to breathe. Water lightly, just enough to moisten the soil without saturating it. Place the pot in a location with bright, indirect light, such as an east-facing windowsill or a shaded patio. Direct sunlight can scorch the tender new growth, while too little light can stunt root development. Think of this phase as a delicate balancing act, where every action shapes the plant’s future.
The Waiting Game: Nurturing Growth Through Patience and Observation
Propagation is not a sprint; it’s a slow, meditative process that rewards those who embrace the art of waiting. In the first few weeks, resist the urge to overwater or fertilize. Instead, monitor the soil moisture closely—it should dry out completely between waterings. A moisture meter can be a valuable tool here, as it takes the guesswork out of watering. Watch for signs of progress: a slight firmness in the offset’s flesh indicates healthy water storage, while wrinkling suggests it’s time for a drink. Rotate the pot occasionally to ensure even light exposure, preventing the offset from leaning toward the sun. If you notice pests, such as mealybugs or spider mites, act swiftly with a gentle insecticidal soap or neem oil spray. This phase is about building trust with your plant, learning its rhythms, and celebrating small victories along the way.
Transplanting with Confidence: When and How to Upsize
As your Ferocactus offset grows, it will eventually outgrow its initial home. Transplanting is a milestone worth celebrating, but it requires timing and technique. Wait until the offset has developed a robust root system—this typically takes 6 to 12 months, depending on growing conditions. Signs that it’s ready include visible roots emerging from the drainage holes or a noticeable increase in size. Choose a new pot that’s only slightly larger than the previous one, as Ferocactus prefer snug quarters. Gently remove the plant from its pot, loosen the roots if they’re circling, and place it in fresh, dry soil. Avoid watering immediately after transplanting; instead, wait a week to allow any disturbed roots to heal. This step is about giving your cactus room to thrive while maintaining the stability it needs to flourish.
Troubleshooting Common Pitfalls: Saving Your Propagation from Disaster
Even the most careful propagators encounter challenges, but knowledge is your best defense. If your offset develops soft, mushy spots, it’s likely suffering from rot—remove it from the soil, trim away the affected tissue, and allow it to cure before replanting in fresh, dry mix. Yellowing or wrinkling can signal underwatering, while a pale, stretched appearance indicates insufficient light. Pests are another common foe; inspect your plant regularly for webbing, cottony clusters, or tiny crawling insects. If you spot them, isolate the affected plant and treat it with a targeted solution. Overwatering is the most insidious threat, so when in doubt, err on the side of underwatering. Remember, Ferocactus are survivors—they’ve adapted to thrive in conditions that would kill most plants. With a little patience and attention, you can guide your offset back to health.
The Reward: Witnessing Your Ferocactus Thrive and Bloom
There’s a profound joy in watching a tiny offset grow into a majestic Ferocactus, its spines radiating like a crown and its flowers unfurling in a burst of color. Depending on the species, blooming may take several years, but the wait is part of the magic. Provide your cactus with plenty of sunlight, minimal water during dormancy, and occasional fertilization with a balanced, low-nitrogen fertilizer. As it matures, you’ll notice the telltale signs of readiness to bloom: a thickening of the ribs, a slight change in spine color, or the emergence of a flower bud. When the first bloom appears, it’s a testament to your dedication and the plant’s resilience. This is the moment when all your patience, care, and attention converge into a single, breathtaking spectacle—a living symbol of the desert’s enduring spirit.
FAQ
What is the best time to propagate Ferocactus?
The best time to propagate Ferocactus is during late spring or early summer when the plant is actively growing.
How do I know if my offset is healthy for propagation?
A healthy offset should be at least one-third the size of the parent plant, firm, plump, and free from discoloration or mushy spots.
What type of soil is best for Ferocactus propagation?
A fast-draining soil mix with 60% inorganic material and 40% mineral-rich components is ideal for Ferocactus.




Leave a Reply