

Short Answer
There’s something profoundly magical about watching a single leaf or stem transform into a thriving, blossoming plant. Schlumbergera, affectionately known as the Christmas cactus, embodies this enchantment with its vibrant, cascading blooms that defy the chill of winter. If you’ve ever marveled at a friend’s lush, flowering Schlumbergera and wondered how to cultivate your own, this step-by-step tutorial is your gateway to becoming a propagator of botanical beauty. Whether you’re a seasoned plant enthusiast or a curious beginner, growing Schlumbergera from cuttings is an accessible and rewarding endeavor that connects you to the ancient art of plant propagation.
The Allure of Schlumbergera: Why This Cactus Captivates Hearts
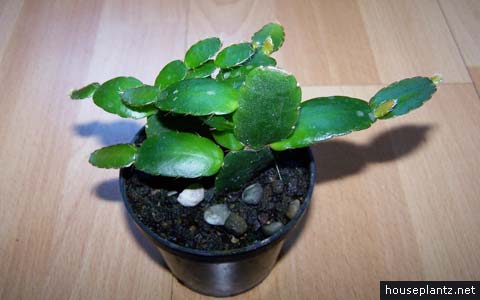
Schlumbergera isn’t your typical cactus—it’s a desert-dwelling epiphyte that thrives in the humid, shaded crevices of tropical forests. Its segmented stems, often mistaken for leaves, store water with remarkable efficiency, allowing it to flourish in conditions where other plants might wither. The true showstopper, however, is its radiant blossoms. Picture this: in the depths of winter, when most gardens lie dormant, your Schlumbergera bursts forth with fuchsia, pink, or white flowers that seem to defy the season itself. This resilience and beauty make it a beloved houseplant, but its propagation potential elevates it to a symbol of growth and renewal.
Growing Schlumbergera from cuttings isn’t just about expanding your plant collection—it’s about participating in a cycle of life that’s been unfolding for millennia. Each cutting you nurture carries the genetic legacy of its parent, a silent testament to the plant’s adaptability and tenacity. Plus, there’s an undeniable thrill in presenting a newly rooted cutting to a friend, watching their eyes light up as they realize they, too, can cultivate this botanical wonder.
Choosing the Perfect Cutting: The Foundation of Success
The first step in your propagation journey is selecting the ideal cutting. Not all stems are created equal—look for healthy, mature segments that are plump and firm, free from signs of dehydration or disease. Ideally, your cutting should be 2-5 segments long, as shorter pieces may struggle to establish roots, while longer ones can become top-heavy and prone to rot. Gently twist or snip the stem at the joint where it meets the main plant, ensuring you don’t leave any ragged edges that could invite infection.
Timing matters, too. The best cuttings are taken during the plant’s active growing season, typically in spring or early summer, when the Schlumbergera is primed to channel its energy into root development. Avoid propagating during the plant’s dormant phase in late fall or winter, as the cuttings may lack the vigor needed to take root. And here’s a pro tip: if your Schlumbergera is in bloom, wait until the flowers fade before taking cuttings. A flowering plant is already expending energy on reproduction, and you don’t want to divert its resources away from root growth.
Preparing the Cutting: A Ritual of Patience and Precision
Once you’ve selected your cutting, the real work begins. Start by allowing the cut end to callous over for 24-48 hours. This step is crucial—it prevents the exposed tissue from absorbing too much moisture and rotting once it’s planted. Place the cutting in a dry, shaded spot, and resist the urge to rush it into soil. Patience here is your greatest ally.
While the cutting callouses, prepare your rooting medium. Schlumbergera thrives in a well-draining mix, so avoid heavy soils that retain moisture. A blend of perlite, coarse sand, and a touch of peat moss or coconut coir mimics the loose, airy conditions of its natural habitat. Sterilize your tools and containers to eliminate any lurking pathogens, and you’re ready to plant.
Insert the calloused end of the cutting about an inch into the soil, ensuring it stands upright. Lightly press the soil around the base to anchor the cutting, but don’t compact it—Schlumbergera needs oxygen at its roots to flourish. If you’re propagating multiple cuttings, space them at least an inch apart to allow for airflow and prevent overcrowding.
Creating the Ideal Environment: A Haven for Root Growth
Now comes the delicate balance of providing the right conditions for root development. Schlumbergera cuttings are sensitive to extremes, so aim for a warm, humid environment with indirect light. A bright windowsill with a sheer curtain to diffuse harsh sunlight is perfect, or consider using a humidity dome to maintain moisture levels. If you don’t have a dome, a clear plastic bag secured loosely over the container can mimic the effect.
Temperature is key—keep your cutting in a spot where the ambient temperature hovers between 70-75°F (21-24°C). Avoid drafts, heaters, or air conditioning vents, as sudden temperature fluctuations can shock the cutting and stunt root growth. And here’s a lesser-known trick: a gentle bottom heat source, like a heat mat set to low, can accelerate rooting by encouraging metabolic activity in the cutting.
Mist the cutting lightly every few days to keep the soil slightly moist but never soggy. Overwatering is the fastest way to invite rot, so err on the side of caution. If you’re using a humidity dome, you may need to water less frequently, as condensation will help maintain moisture levels.
The Waiting Game: Signs of Progress and Pitfalls to Avoid
Rooting Schlumbergera cuttings is a test of patience, but the rewards are worth the wait. In ideal conditions, you may see the first signs of root growth in as little as 2-4 weeks, though it can take up to 8 weeks for a robust root system to develop. During this time, resist the temptation to tug gently on the cutting to check for roots—this can disrupt the delicate new growth and set your progress back.
Instead, look for visual cues that your cutting is thriving. New growth at the top of the stem is a sure sign that the cutting is establishing itself. You might also notice the cutting feeling slightly firmer in the soil, a subtle indication that roots are anchoring it in place. If the cutting begins to wrinkle or shrivel, it’s a sign of dehydration—mist it more frequently or increase humidity.
Be vigilant for signs of distress, such as yellowing segments, mushy stems, or a foul odor, which indicate rot. If you spot these symptoms, remove the cutting from the soil, trim away any affected areas, and allow it to callous again before replanting in fresh, dry medium. It’s a setback, but not a failure—propagation is as much about learning from mistakes as it is about success.
Transplanting and Beyond: Nurturing Your New Schlumbergera
Once your cutting has developed a healthy root system—typically when you see new growth or resistance when gently tugged—it’s time to transplant it into its permanent home. Choose a container with drainage holes and a well-draining soil mix, such as a blend of potting soil, perlite, and orchid bark. Schlumbergera prefers to be slightly root-bound, so opt for a pot that’s only slightly larger than the cutting’s root ball.
Water the newly transplanted cutting lightly, allowing the soil to dry out slightly between waterings. Resume your regular care routine, which includes bright, indirect light and occasional misting to maintain humidity. Schlumbergera is a forgiving plant, but it thrives when its needs are met with consistency.
As your cutting matures, you’ll be rewarded with a lush, branching plant that’s ready to bloom. To encourage flowering, provide it with a period of cooler temperatures (around 50-55°F or 10-13°C) for 6-8 weeks in the fall, followed by a return to warmer conditions. This mimics the natural temperature fluctuations of its native habitat and triggers the plant to produce its signature winter blooms.
Troubleshooting Common Challenges: A Guide to Resilience
Even the most experienced plant enthusiasts encounter hurdles, and Schlumbergera propagation is no exception. If your cutting fails to root, consider whether the timing was off—perhaps it was taken during the plant’s dormant phase. Alternatively, the cutting may have been too young or too old, or the rooting medium may have been too wet or too dry. Adjust your approach and try again; propagation is as much an art as it is a science.
Pests can also pose a threat, with mealybugs and spider mites being the most common culprits. Inspect your cuttings regularly, and if you spot any unwanted visitors, treat them with a gentle insecticidal soap or neem oil solution. Prevention is key—keep your plants clean and well-ventilated to deter pests before they become a problem.
And then there’s the heartbreak of a cutting that simply doesn’t take. It happens to the best of us. Instead of dwelling on the loss, celebrate the knowledge you’ve gained and the resilience you’ve cultivated. Every propagation attempt is a step forward, even if the outcome isn’t what you expected.
The Rewards of Propagation: A Legacy of Growth
There’s a profound satisfaction in nurturing a cutting into a thriving plant, one that you can share with others or pass down through generations. Schlumbergera, with its vibrant blooms and resilient nature, is more than just a houseplant—it’s a living testament to the power of growth and renewal. Whether you’re propagating for the joy of it, to expand your collection, or to gift a piece of nature to a loved one, each cutting you root is a small act of defiance against the fleeting nature of time.
So, gather your tools, select your cuttings, and embark on this botanical adventure. The world of Schlumbergera propagation awaits, and with each step, you’re not just growing a plant—you’re cultivating a legacy.
FAQ
What is Schlumbergera?
Schlumbergera, commonly known as Christmas cactus, is a tropical epiphytic cactus popular for its vibrant winter blooms.
When is the best time to take cuttings?
The best time to take cuttings is during the plant's active growing season, typically in spring or early summer.
How can I tell if my cutting is rooting?
Look for new growth at the top of the stem and a firmer feel in the soil as signs that roots are developing.



Leave a Reply