
Short Answer
Ever found yourself staring at your Schlumbergera, that vibrant, zigzagging marvel of the plant world, and wondered: “Is it time to give this beauty a fresh start?” If so, you’re not alone. Repotting a Schlumbergera—often affectionately dubbed the “Christmas cactus” or “Zygocactus”—can feel like a delicate dance between nurturing growth and avoiding a botanical blunder. But fear not! With the right steps, a sprinkle of patience, and a dash of enthusiasm, you’ll have your Schlumbergera thriving in its new home in no time. Let’s dive into this green-thumbed adventure together.
The Prelude: Why Repot Your Schlumbergera?
Before you even think about wielding a trowel, let’s address the elephant in the room: Why repot at all? Schlumbergeras, like all living things, have needs that evolve over time. Perhaps your cactus has outgrown its pot, its roots are staging a rebellion by peeking out of the drainage holes, or the soil has turned into a sad, compacted wasteland. Maybe you’re simply eager to give your plant a fresh lease on life with nutrient-rich soil. Whatever the reason, repotting is a rite of passage for any devoted plant parent. It’s not just about space—it’s about rejuvenation, a chance to inspect your plant’s health, and an opportunity to deepen your bond with this fascinating species. After all, a thriving Schlumbergera is a happy Schlumbergera!
Timing Is Everything: When to Repot
Timing isn’t just a concept for comedians or romance novels—it’s crucial in the world of plant care. The best time to repot your Schlumbergera is in the spring, just as it’s emerging from its winter slumber. This is when the plant is primed for growth, making it the perfect moment to shake off the old and embrace the new. Avoid repotting during its blooming period (typically late fall to early winter), as this can stress the plant and sabotage those gorgeous, holiday-ready flowers. And if you’re thinking, “But my Schlumbergera looks fine!”—think again. Even if it’s not screaming for a new home, a gentle repotting every 2-3 years keeps it in tip-top shape. Pro tip: If you notice yellowing leaves, stunted growth, or soil that dries out faster than a desert mirage, it’s a clear sign your plant is begging for a change of scenery.
The Toolkit: Gathering Your Arsenal
Repotting isn’t a free-for-all—it’s a strategic operation. You wouldn’t go into battle without the right gear, and the same goes for repotting your Schlumbergera. Here’s your essential toolkit:
- A Pot with Pizzazz: Choose a container that’s just 1-2 inches larger in diameter than the current one. Too big, and you risk waterlogging; too small, and you’ll suffocate those roots. Drainage holes are non-negotiable—your Schlumbergera’s roots need to breathe, not swim.
- Fresh Soil, Fresh Start: A well-draining, airy mix is key. Think of it as a cozy, breathable blanket for your plant’s roots. A blend of potting soil, perlite, and a handful of orchid bark or coarse sand works wonders. Avoid heavy, moisture-retentive soils—they’re the fast track to root rot.
- Gloves (Optional but Chic): If you’re squeamish about getting your hands dirty—or if your nails are your pride and joy—don a pair of snug gloves. Bonus points if they’re cute.
- A Trowel or Spoon: For gently coaxing your plant out of its old pot. A butter knife works in a pinch, but let’s aim for elegance.
- A Spray Bottle: To mist the roots and keep them hydrated during the transition.
- Patience and a Dash of Optimism: Repotting can feel like a high-stakes surgery, but remember, you’ve got this. And if things go awry? Even the most seasoned gardeners have plant casualties. Learn, adapt, and try again!
The Grand Escape: Removing Your Schlumbergera from Its Pot
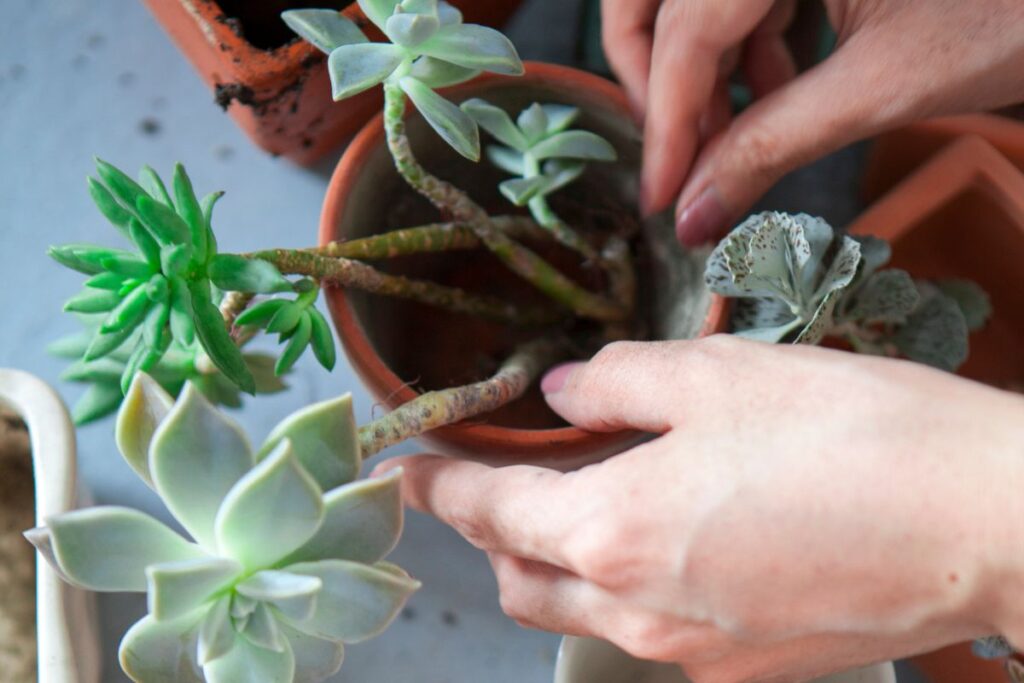
Now, the moment of truth: freeing your Schlumbergera from its cramped quarters. Start by giving the plant a good drink 1-2 days before repotting—this loosens the soil and makes the extraction smoother. Gently squeeze the sides of the pot to encourage the root ball to loosen. If it’s stubborn, run a knife around the edges or tilt the pot at an angle and tap the bottom. Once it’s free, resist the urge to yank! Instead, cradle the base of the plant and ease it out with a gentle wiggle. If the roots are coiled like a snake at a rock concert, don’t panic. This is normal. Just be extra careful not to damage them.
Inspect the roots like a detective on a case. Healthy roots should be firm and white or light tan. Any mushy, black, or foul-smelling roots? Those are red flags for root rot—snip them away with sterilized scissors. Think of it as giving your plant a fresh haircut: a little trim now prevents bigger problems later.
The New Dig: Preparing the Pot and Soil
With your Schlumbergera liberated and its roots inspected, it’s time to set the stage for its grand debut. Start by placing a layer of fresh soil at the bottom of the new pot—about an inch or two should do. This creates a comfy cushion for the roots and ensures proper drainage. If your pot is particularly large, you can add a layer of small pebbles or broken pottery pieces to enhance drainage further. Just don’t go overboard; we’re aiming for balance, not a rock garden.
Next, position your Schlumbergera in the pot. The top of the root ball should sit about an inch below the rim of the pot. This gives you room to water without creating a soil avalanche. Adjust the soil layer beneath the plant as needed to achieve the perfect height. Now, fill in the gaps around the root ball with your fresh soil mix, gently pressing it down to eliminate air pockets. Be firm but not forceful—think of tucking your plant into bed, not packing it into a suitcase.
The Aftercare: Nurturing Your Newly Repotted Schlumbergera
Congratulations! Your Schlumbergera is now snug in its new home. But the work isn’t over yet. The first few weeks are critical for helping your plant adjust to its new digs. Here’s how to ensure a smooth transition:
- Hydration Station: Water your Schlumbergera lightly after repotting, just enough to settle the soil. Avoid soaking it—overwatering is the quickest way to drown your plant’s enthusiasm for its new home. Wait until the top inch of soil is dry before watering again.
- Shade and Serenity: For the first week or two, keep your Schlumbergera in a shady, cool spot. Direct sunlight can stress it out during this vulnerable period. Think of it as a post-surgery recovery room—gentle and stress-free.
- Hold the Fertilizer: Skip the plant food for at least a month. Fresh soil is already nutrient-rich, and fertilizing too soon can burn tender new roots. Patience, dear plant parent!
- Watch and Learn: Keep an eye on your Schlumbergera for signs of distress—yellowing leaves, wilting, or a general look of “meh.” If something seems off, reassess your care routine. Is it too dry? Too wet? Too much drama? Adjust accordingly.
The Blooming Finale: Encouraging Future Flowers
Ah, the pièce de résistance: those stunning, tubular blooms that make Schlumbergeras a holiday favorite. To coax your plant into flowering, you’ll need to mimic its natural environment. Schlumbergeras are photoperiodic, meaning they respond to light cycles. In late summer or early fall, give your plant 12-14 hours of darkness each day for about 6-8 weeks. This tricks it into thinking winter is coming, triggering bud formation. Reduce watering during this period, but don’t let it dry out completely. Once buds appear, resume regular care, and soon you’ll be rewarded with a dazzling display of color.
And there you have it—a complete, step-by-step guide to repotting your Schlumbergera with finesse and flair. Whether you’re a seasoned plant whisperer or a green-thumbed newbie, this process is a celebration of growth, both for your plant and for you. So go ahead, roll up your sleeves, and give your Schlumbergera the fresh start it deserves. After all, every plant—and every plant parent—deserves a little TLC.
FAQ
When is the best time to repot a Schlumbergera?
The best time to repot your Schlumbergera is in the spring, as it is emerging from its winter dormancy.
What type of soil is best for repotting Schlumbergera?
A well-draining mix of potting soil, perlite, and a handful of orchid bark or coarse sand is ideal.
How often should I repot my Schlumbergera?
It’s recommended to repot every 2-3 years, or when you notice signs of root crowding.
What should I do if my Schlumbergera has root rot?
Inspect the roots and trim away any mushy or foul-smelling parts with sterilized scissors.

Leave a Reply